
Bread Proofer Secrets and Banneton Basket Tricks Every Baker Needs
- James Taylor
- May 5
- 6 min read

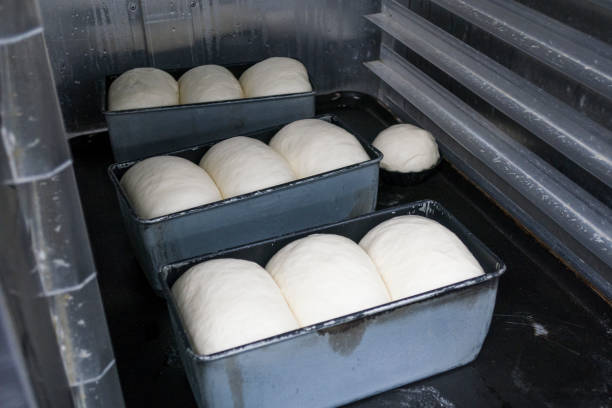
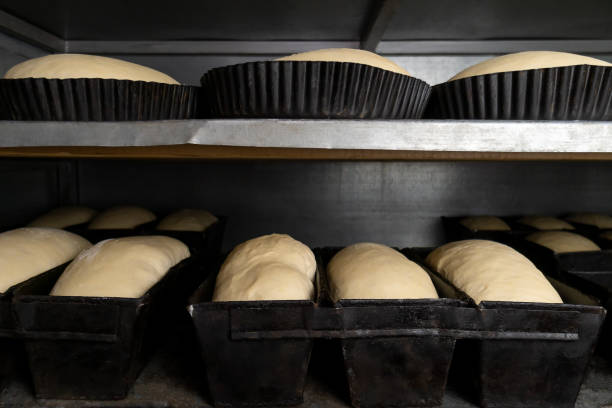
A bread proofer sounds like one of those extras you can skip, and yeah, plenty of people do, but once you use one it’s hard to go back. Dough is picky—it wants steady warmth and a bit of humidity, not the random ups and downs your kitchen throws at it. One day your dough rises beautifully, next day it just sits there doing nothing, and you’re left guessing what went wrong. A bread proofer removes that guessing. It gives your dough a consistent environment so fermentation happens the way it should. Not rushed, not stalled, just steady. You don’t have to keep checking it every ten minutes or moving bowls around your house trying to find a warm spot. It’s controlled, simple, and honestly a bit of a relief if you bake often.
Banneton Bread Proofing Basket: Not Just for Looks
The banneton bread proofing basket gets a lot of hype for the patterns it leaves on dough, and sure, those spiral lines look great, but that’s not the real value. What matters more is structure. Dough, especially high hydration dough, spreads if left unsupported. A banneton holds it in place during the final rise, helping it keep shape so it doesn’t flatten out before baking. There’s also airflow through the cane material, which slightly dries the surface of the dough. That small detail makes scoring easier and improves crust development later. It’s one of those tools that looks simple but quietly does a lot of work behind the scenes.
Bread Proofer vs Room Temperature: The Real Difference
People often say just proof your dough on the counter, and yes, that works sometimes, but it’s inconsistent. Room temperature changes more than you think—morning to night, season to season, even depending on where your kitchen sits. That inconsistency affects fermentation, and suddenly your timing is off. A bread proofer removes that problem. It keeps things stable so your dough behaves predictably. You start understanding how long things actually take instead of guessing every time. It’s not about making baking complicated—it’s about simplifying it by removing variables that mess you up.

Choosing the Right Banneton Bread Proofing Basket Size
Picking the right size banneton bread proofing basket is simpler than people make it, but it still trips folks up. If your basket is too big for your dough, it won’t hold shape well and the dough spreads out too much. Too small, and your dough overflows or gets cramped, which leads to sticking and uneven proofing. For most home bakers, a 9-inch banneton is a solid starting point. It handles typical loaf sizes comfortably. But once you get into baking more regularly, you’ll probably want different sizes anyway because recipes vary, and having options just makes things easier.
How Bread Proofer Settings Affect Your Dough
Using a bread proofer isn’t just about turning it on and walking away—small adjustments matter. Most dough proofs well between 24°C and 30°C, but where you land in that range changes the outcome. Lower temperatures slow things down and develop better flavor, while higher temperatures speed things up but can sacrifice depth. Humidity plays a role too. Too dry, and your dough forms a skin that messes with expansion. Too humid, and it gets sticky and harder to handle. A good bread proofer balances this, but you still need to pay attention and tweak based on your dough.
Preparing Your Banneton the Right Way (Don’t Skip This)
If you skip proper prep with a banneton bread proofing basket, you’ll regret it pretty quickly. Dough sticking is the most common issue, and it usually comes down to flouring. You need more than a light dusting—coat it properly, especially with rice flour since it resists moisture better than regular flour. Some baskets come with cloth liners, which are easier for beginners but don’t give you that classic pattern. Either way works, just depends what you want. And don’t wash your banneton with water after every use. Brush it out, let it dry, keep it simple or you’ll damage it over time.
Combining Bread Proofer and Banneton for Better Results
When you start using a bread proofer and banneton together, things get more consistent in a way that’s hard to ignore. You handle bulk fermentation in the proofer, keeping everything stable, then shape your dough and place it into the banneton for the final proof. Back into the proofer it goes, same controlled environment. The banneton gives your dough structure while the proofer ensures steady fermentation. The result is dough that rises properly, holds shape, and bakes into a loaf that actually looks and tastes right. It’s not complicated—it just works.
Common Mistakes That Ruin Proofing (Yeah, These Hurt)
A few mistakes come up again and again, and they can ruin an otherwise good loaf. Over-proofing is probably the worst—your dough looks ready, maybe even perfect, but once baked it collapses or turns gummy. Under-proofing is just as frustrating, giving you dense bread with a tight crumb. Then there’s ignoring how the dough feels, relying too much on time instead of paying attention. Even with a bread proofer, you still need to watch the dough itself. And with bannetons, sticking issues usually come from poor flouring. Fix that, and you solve half your problems right there.
Cleaning and Maintaining Your Baking Tools
Cleaning your tools doesn’t need to be complicated, but it does need some thought. A banneton bread proofing basket should stay dry—just knock out excess flour, brush it off, and let it air dry. Using water too often can lead to mold or weaken the material. For your bread proofer, a simple wipe-down now and then is enough. You don’t need to treat it like lab equipment. Just keep it clean and functional. Taking care of your tools means they last longer and work better, which saves you frustration down the line.
Is a Bread Proofer Worth It for Home Bakers?
Whether a bread proofer is worth it really depends on how often you bake. If it’s occasional, you can manage without one. But if you bake regularly, trying to improve or experiment, it starts making a lot of sense. It cuts down on failed attempts, helps you understand fermentation better, and gives you consistent results. That consistency builds skill faster than anything else. Pair it with a good banneton bread proofing basket, and you’ve got a setup that actually supports your baking instead of making it harder.

Building Confidence Through Better Proofing
Confidence in baking doesn’t come from reading more recipes—it comes from results you can trust. When you use a bread proofer, your dough behaves more predictably. When you use a banneton, your loaves hold their shape. Those small wins add up. You stop second-guessing every step, stop worrying if your dough is doing the right thing. It’s not about perfection. It’s about knowing what to expect and getting closer to it each time you bake.
Final Thoughts: Simple Tools, Better Bread, Less Guessing
At the end of the day, baking good bread isn’t about having every tool out there—it’s about having the right ones. A bread proofer helps control fermentation, while a banneton bread proofing basket gives your dough structure and shape. Together, they make the process smoother and results more reliable. You don’t eliminate all mistakes, but you reduce the random ones that make baking frustrating. If you’re ready to improve your bread without overcomplicating things, Visit Abioto Baking to start and get tools that actually help you bake better.
FAQs About Bread Proofer and Banneton Bread Proofing Basket
What is the ideal temperature for a bread proofer?
Most bread proofers work best between 24°C and 30°C, giving you a balance between steady rise and good flavor development.
Can I use a banneton bread proofing basket without a liner?
Yes, you can, and many bakers prefer it for better patterns—just make sure to flour it properly to avoid sticking.
Do I really need a bread proofer for home baking?
Not necessarily, but it helps create consistent results and removes a lot of guesswork from fermentation.
Why does dough stick to my banneton?
Usually because there isn’t enough flour or the wrong type was used—rice flour works best to prevent sticking.
How do I clean a banneton basket?
Brush out excess flour and let it dry completely; avoid washing it with water too often.
Can I proof dough overnight in a bread proofer?
You can, but lower temperatures are better for long proofs, otherwise the dough may over-proof.


Comments